Help Center
Back to Home
- Help Center
Publish
How can I add my Custom Domain?
How can I add my Custom Domain?
1. Go to the Website you want to add your Custom Domain.
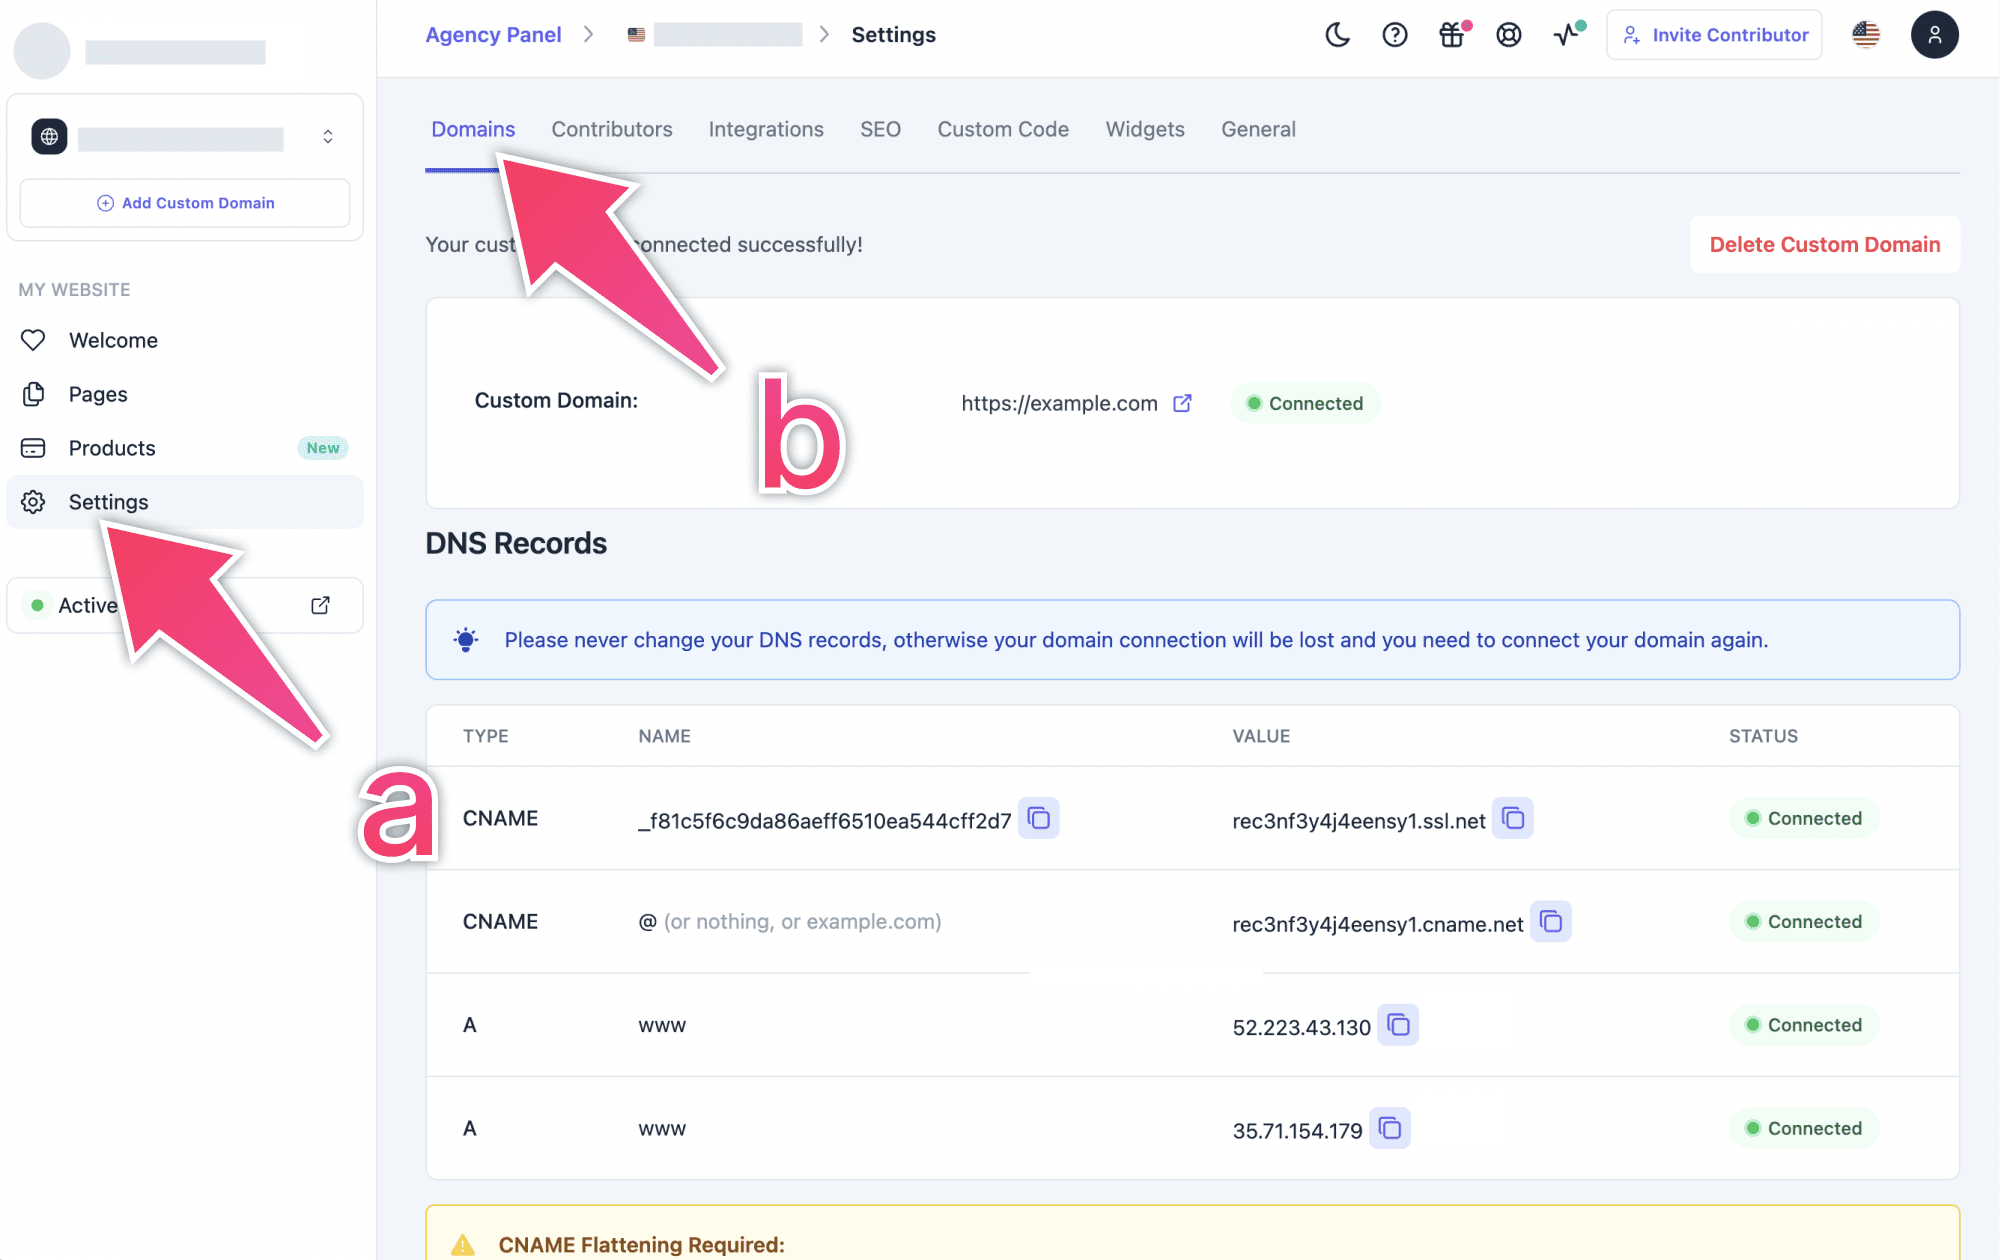
2. Click on Settings on the left sidebar.
3. Click on the Domains tab.
4. Click on the Add your Domain button.
5. Enter the exact domain you wish to connect (e.g. www.example.com)
6. Select Domain Connection Type from the options:
- A) Add www.example.com and redirect example.com to www.example.com (Recommended)
- B) Add example.com and redirect www.example.com to example.com
- C) Add www.example.com
- D) Add example.com
7. Visit the admin console of your domain registrar and add the generated DNS Records. (If you're unsure about this, please get in touch with the vendor's support team where you purchased your domain. They can guide you on adding the DNS records.)
Warning!
Your DNS records for this custom domain will expire in 72 hours! Please add DNS records with your domain provider before the DNS records expire.
Attention!
Remove any conflicting DNS records like A, AAAA, CNAME, ALIAS or ANAME that has the same name or host as what you're trying to add.
8. Once you have added the DNS records, you'll notice the status of each record change from not connected to connected. When everything is connected, click the Connect your domain button at the top of the page.
9. Once everything is completed, you will notice that your domain status will change to Connected.
Cloudflare Action Required!
Please disable the Proxy status of DNS records in your Cloudflare dashboard as per the instructions below. Failure to take action may result in the deletion of your custom domain.
CNAME Flattening Required
CNAME Flattening Required
If you connect your Root domain, you'll see a warning that you need CNAME Flattening.
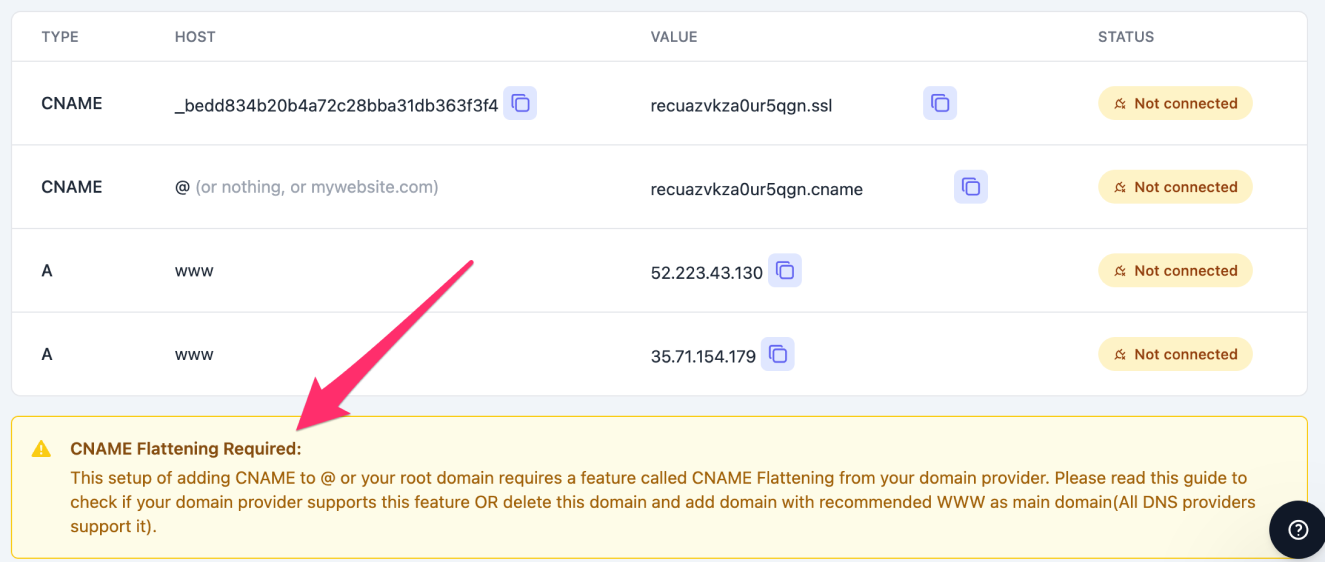
This means you need to read the guide and check if your provider supports CNAME Flattening. Don't worry, and there is also a solution at the end of the guide on what to do if your domain doesn't support CNAME Flattening:
mRMvlJ
- Help Center
Theme